How Much to Patch a Tire from Experience


Inside: Learn how much to effectively patch a tire. Get insights on DIY or professional tire repair to make an informed decision.
You walk outside ready to drive away- only to quickly realize a nail has punctured your tire! This is so incredibly frustrating.
This summer it happened to me not once, but twice!
Not only does it pose a potential safety risk owing to reduced fuel efficiency and poor handling, but it can also substantially disrupt your day by necessitating an unexpected trip to the tire repair shop.
From my experience, you can learn how much patching a tire costs.
What is Tire Patching?
Patching a tire involves repairing a puncture in the tread area of the tire. A patch, typically a rubber material, is installed on the inside of the tire after the puncture has been located and repaired.
This tire plug repair method is used to seal the puncture, preventing the tire from losing air, and extending the life of the tire significantly. Patching tires is a cost-effective solution that helps vehicle owners maintain their tires without burning a hole in their pocket.
Quick Answer
Patching a tire DIY can cost as little as $6 if you have most of the tools, but having the job done at an auto repair shop, which includes labor time and professional expertise, ranges from $20-$40.
You can patch a tire for free if you go to the company that installed your tires.
Common Causes for Tire Damage
Tires suffer damage due to a variety of reasons. One of the primary culprits is road hazards, such as nails, screws, or shards of glass leading to punctures – a scenario that can cause a slow leak or even a sudden blowout if the object creates a large hole.
Bumps in the road, severe weather conditions, improper storage, or simple wear and tear due to age can also result in tire damage. Moreover, tire bead issues, where the bead that holds the tire to the wheel’s rim slips and becomes damaged due to improper inflation, can also give rise to serious issues affecting the car’s ride, handling, and safety.
Regular visual checks of your tires can help spot signs of imminent damage like cuts, punctures, cracks, or bulges.
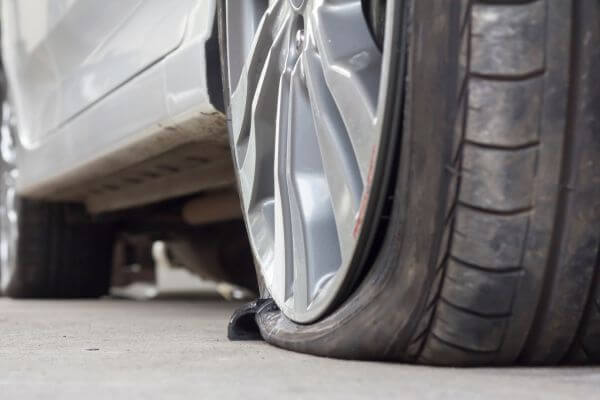
Why Patch a Tire? Potential Risks of Ignoring Tire Damage
Ignoring tire damage can lead to serious repercussions. A damaged tire can drastically affect the performance and handling of your vehicle, compromising ride comfort and fuel efficiency.
The most immediate danger, however, is the increased likelihood of a tire blowout. I have been there – remember the Ford Explorer tire issues?1 I was on the highway and thankfully was able to stop safely thanks to another driver who slowed down so my SUV could hobble to the side and roll to a stop safely. The severity of this situation cannot be emphasized enough.
This can happen when driving on a severely damaged or worn tire (or tire malfunction) – a situation that can lead to a serious accident. Additionally, driving with damaged tires can cause uneven wear and tear on other tires, possibly increasing your maintenance costs in the long run. Remember, while the cost of a new tire may seem steep, it’s a worthy investment in your safety.
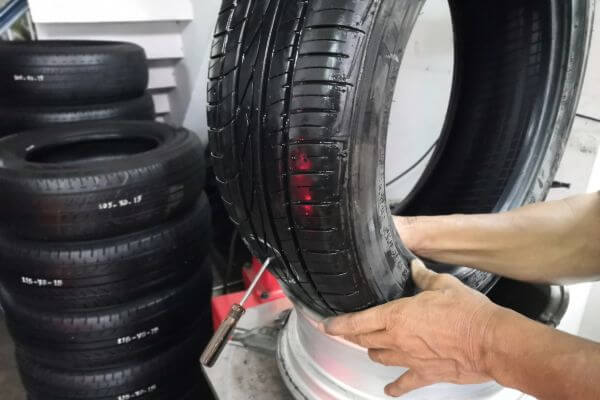
How to Diagnose a Damaged Tire
Step #1: Finding the Leak
Locating a leak in a tire involves a careful and systematic process. First and foremost, mechanics use their senses to determine the origin of the leak. They inflate the tire to make it easier to find leaks because the air tends to escape more prominently from them or use a bubble solution. Next, they visually inspect the tire for any cuts, holes, or objects sticking out, like nails or screws.
Aside from a visual inspection, mechanics also listen for a distinctive hissing sound – a clear indication of escaping air. If the leak isn’t immediately visible or audible, a soapy water test can be performed. This involves mixing water and dish soap in a spray bottle, inflating the tire, and spraying the solution over it. Bubbles will begin to form where the air escapes, clearly identifying the location of the leak.
Step #2: Checking the Extent of the Puncture
Determining the extent of a puncture is crucial in detecting whether a patch repair will suffice or if a tire replacement is needed. A mechanic will typically measure the size of the puncture; if the wound is larger than 1/4 inch in diameter, a patch may not effectively seal the tire.
The mechanic will also check the location of the puncture. Punctures close to or on the sidewall are usually non-repairable, primarily because the flexing of the sidewall could cause repaired areas to break open. The structure of the tire could also be compromised, making it unfit for a patch.
Any internal damage, such as severe abrasions, penetrations, or bruising, can not be repaired. Certain punctures made by large, sharp objects, or those resulting from a high-speed impact, may also leave the tire beyond repair.
Further, tires that have already undergone a certain number of repairs should not be patched again, as they risk losing their essential strength, leading to possible tire failure while driving.
How long can I drive with a nail in my tire?
When you find a nail in your tire, your immediate concern is often: how far can I continue to drive? Though there’s no definitive answer, driving with a nail in your tire isn’t advised. The nail can cause the tire to lose air slowly over time, negatively impacting the vehicle’s fuel efficiency and handling, and even leading to a tire blowout.
While it might be possible to drive for a few miles, or even a few days in some cases (depending on the nail’s size, location, and the tire’s condition), you should address the situation as soon as you notice it to prevent further deterioration.
The safest course of action is to drive slowly and carefully to the nearest tire repair shop. Do not attempt to remove the nail yourself as that could potentially worsen the damage and make the tire irreparable.
Remember, safety should be a driver’s primary concern, not the inconvenience of a tire repair.
Can Your Tire Be Patched?

Factors Determining Patch-ability
When determining whether a tire can be patched, several factors come into play. Here are a few key elements that determine the patch-ability of a tire:
- Location of the Puncture: Tires can only be patched if the damage is confined to the tread area. Punctures in the shoulder or sidewall are not patchable due to the immense pressure these areas bear while driving.
- Size of the Puncture: The size of the puncture greatly affects whether a tire can be patched. Generally, punctures up to 1/4 inch in diameter can be repaired, but anything larger than that cannot.
- Number of Punctures: A tire with multiple punctures may not be patchable. Each case is unique, and a professional should evaluate the tire to determine if and how it can be repaired.
- Angle of the Puncture: The angle of the puncture also plays a role. If the angle is strange or the puncture goes in sideways, patching may not be the best solution.
- Overall Condition of the Tires: If the tire has already endured a patch near the current hole, or the sidewalls have serious damage or bulging, a patch may not suffice and a tire replacement could be needed. Also, if the tread depth is already at or beyond the wear bars, even a simple puncture can mean the end of the tire’s useful life.
Remember, always bring your tire to a professional for evaluation and repair. Proper inspection and repair are vital to ensuring the continued safety and performance of your tires.
When Not To Patch
It’s important to understand that not all tire damages can or should be patched. There are situations where patching a tire is not advisable or safe. These situations include:
- A Puncture at an Odd Angle: If the hole is at a strange or awkward angle, a patch may not seal the hole effectively, leading to air loss.
- Severe Sidewall Damage: A tire’s sidewall is a critical part of its construction, and if severely damaged, patching would not be able to restore its structural integrity.
- Bulges or Bubbles in the Rubber: Bulges or bubbles indicate structural failure within the layers of the tire. Since these faults are on the inside, a patch cannot rectify the problem.
- A Patch Near the Current Puncture: If your tire has already been patched near the current hole, applying another patch might compromise the integrity of the tire and its ability to carry load reliably.
- Multiple Issues at Once: Your tire might be experiencing a second issue along with the puncture, like unbalanced wear, tread separation, or other structural failings. In such a case, it would be safer and more economical to replace it.
Always remember, when in doubt about whether to patch or not, consult a professional tire technician to ensure the safety and longevity of your tires.
Cost Breakdown of Tire Patching
Free With Purchase of Tires
One of the most advantageous aspects of maintaining your tires is that they can actually be free of charge at the location where you bought your tires.
- For instance, if you’ve bought your tires and had them installed at Costco, you are entitled to free flat tire patching. This service comes as an extension of their commitment to customers, and their affordable prices make them a thrifty option to consider.
- Discount Tire is another prominent name when it comes to economical and quality services. You can get your tire inspected for free here, and if a tire patch is the solution, they will repair your tire without charging you a penny if you bought those tires with them.
This service goes a long way in saving their customers’ hard-earned money and reinforces their reputation as a budget-friendly grandstand in the automotive industry.
Tire Repair Shop
A substantial part of the tire repair cost at a tire repair shop is majorly attributed to the mechanic’s labor charges. While a tire patch job takes approximately 15 minutes, the cost of shop overhead costs is the biggest expense.
You can expect to pay between $20-$40 for this service. While traveling, we paid $25 to fix a nail in the tire.
However, just remember, that you are paying for the mechanic’s expertise, and time dedicated to the repair which primarily constitutes the cost.
At Home Repair Costs
Materials you’ll need are a tire patch kit, a pair of pliers, a car jack, a lug wrench, soapy water, and a spray bottle. Optionally, a tire marker can be useful.
The retail value of these tire repair materials can range around $6. The pricier items would be if you have the supplies to jack up the car or proper wrenches.
Many people who drive beater cars have become good and maintain their car to lower their costs.
Other potential expenditures
Apart from the primary costs of labor and materials, there may be other expenditures while patching a tire. One such possible fee is the cost of tire rebalancing. When tires have been removed and replaced or repaired, they should be rebalanced to ensure smooth and optimal vehicle performance. This service might add around $100 to your overall bill.
Moreover, in some cases, there could be a tire disposal fee. Suppose, after inspection, the professional deems your tire beyond repair and it needs to be replaced, the old tire has to be discarded properly. Many shops handle this disposal but might charge a small fee (usually around $2-$5) for the service.
DIY Process of Tire Patching – How to Patch a Tire at Home

If you choose to do it yourself, here are the steps to take.
Removing and Dismounting the Tire
- Remove the Tire from the Vehicle: To remove the tire from the vehicle, first, you’ll need to loosen the lug nuts with a wrench while the vehicle is on the ground. Once they’re loosened, raise the car with a jack. Now you can fully remove the lug nuts and pull the wheel from the vehicle.
- Release the Air: With the tire removed, you need to let the air out by removing the valve stem core with a special removal tool. This will lead to a complete release of tire pressure.
- Break the Bead: Breaking the bead, which refers to the seal between the tire and the wheel rim, is the next step. This can be done with a tire spoon and a hammer. The bead must be broken on both sides before the tire can come off the rim.
- Remove the Tire from the Rim: This is done using levers or specialized tire removing tools. You must carefully insert the tools and lever the tire off the rim.
Remember, while the dismounting process might seem easy, it requires careful attention and certain specialized tools. It’s advised to have a tire repair professional handle this job to ensure safety and precision.
Applying the Tire Patch
Once the tire has been removed and dismounted, the next step involves the application of the tire patch. This process is as follows:
- Preparation of the Area: The area around the puncture inside the tire is prepped by cleaning and roughening up a bit. This cleaning is essential to ensure the patch will adhere securely. The punctured area should be buffed with a grinding stone or sanding tool strong enough to bring the inner liner to a velvet-like finish.
- Clean Dust and Debris: Using an air blow gun, all dust and debris need to be cleaned from the tire, especially those left by the buffing process.
- Applying the Patch: An adhesive cement needs to be applied to the prepped area before the patch. Once the cement has dried to a tacky touch, the patch is applied. The patch, on its sticky side, has to be applied towards the interior side of the tire at the punctured spot.
- Rolling the Patch: After the patch has been placed, a roller is used over it to remove any possible air bubbles trapped between the patch and the liner. This is important for ensuring optimum adhesion.
- Apply Sealant: A sealant is applied around the edges of the tire patch to further secure it and to ensure that no air can escape from around the patch.
Each patch needs a different type of cement and a different style of application. Thoroughly read and follow the manufacturer’s instructions while applying the specific patch.
Remember, if you don’t feel comfortable doing this process yourself, a professional can easily and quickly do it for you.
Reinstalling the Patched Tire
After the patched tire has been given sufficient time to dry and cure, it’s ready to be reinstalled. Here’s how it’s done:
- Mount the Tire: Using a tire-changing machine, mount the tire back onto the wheel rim. Ensure the valve stem is pulled through its hole in the rim, and the bead of the tire is properly seated.
- Inflate the Tire: Next, inflate the tire to the appropriate air pressure – typically, the recommended pressure is indicated on a placard on the vehicle’s door edge, doorpost, glove box, or fuel door.
- Rebalance the Tire: The process of patching may have unbalanced the tire. So, it’s prudent to have the tire checked for balance. This is done using a balancing machine that spins the wheel and tire.
- Reattach the Tire: Reattach the wheel with the patched tire onto the vehicle. Apply even pressure while screwing the lug nuts back on in a star pattern for even distribution of the load. Lastly, using a torque wrench, securely tighten the lug nuts to the manufacturer’s recommended torque.
- Drive the Vehicle: Initially, carry out a test drive at a slow speed to make sure the repair was successful. Listen for strange noises and feel for abrupt shaking. If all seems well, resume your regular driving.
Remember that even though patching a tire may seem simple, it requires specialized tools, time, and expertise. If you don’t have the proper tools, it may be more cost-effective and reliable to have the tire patched by a professional.
Tips to Maintain your Tires and Avoid Frequent Patches

Tip #1 – Regular Checks and Balancing
Routine tire checks and balancing can go a long way in prolonging your tires’ life and reducing the need for patches.
Regular checks help you identify and address minor issues like lower tire pressures, slow leaks, or tire damages early before they worsen into more significant problems. Make it a point to visually inspect your tires at least once a month and before long trips.
Balancing your tires is equally crucial – an imbalanced tire can cause vibrations, uneven tire wear, and strain on the car’s suspension. It is recommended to have your tires balanced every 12,000 miles, or when the car has issues with steering wheel vibrations.
Tip #2 – Timely Tire Rotations
Another critical preventive maintenance task to prolong the life of your tires is timely tire rotations. Rotating your tires can help achieve more uniform tire tread wear, which extends their lifespan and improves your vehicle’s performance.
Typically, tires should be rotated every 5,000 to 8,000 miles or as specified by your vehicle’s manufacturer. During the rotation, tires are moved from one position on the vehicle to another – for example, the front tires to the rear and vice versa.
Since front tires often wear out quicker than rear tires due to weight distribution and turning forces, this rotation helps evenly distribute the wear across all tires. Regular rotations not just prolong your tire lifespan but also improve gas mileage, provide an improved ride experience, and mean you’re less likely to experience sudden tire failure.
I just add this task to my digital planner with how many miles were on the car when the tires were rotated.
Tip #3 – Proper Inflation and Pressure Maintenance
Maintaining correct tire pressure is a crucial aspect of tire care that can drastically improve your vehicle’s performance, fuel efficiency, and tire longevity. Both over inflation and underinflation pose risks to the safety and wear of your tires.
- Underinflated tires can lead to poor fuel efficiency, reduced handling, and increased tire wear.
- Overinflated tires, on the other hand, can make your vehicle more susceptible to impact damage. You should check your tire pressure at least once a month and before long trips.
Thankfully, many of the newer vehicles will have this in your dash to monitor. The old-fashioned way is to use a reliable tire pressure gauge and refer to your vehicle’s manual or the placard on the driver’s side door post for the correct pressure.
Frequently Asked Questions
Isn’t Patching a Tire Fun?

Don’t forget to use your spare tire if the pressure cannot be maintained in the tire.
Indeed, patching a tire may seem an intriguing and rewarding experience, especially for those with a knack for DIY activities. However, even when it looks like an easy fix, tire patching involves meticulous examination, skill, and a proper understanding of safety measures.
Your tires are your vehicle’s sole point of contact with the road, and their health directly impacts your vehicle’s performance and your safety. So whether you’re patching a tire using a tire repair kit at home or taking it to a professional, it’s essential to ensure the job is executed correctly.
Remember, that car is an asset!
When it comes to tires, no quick fixes are worth risking your safety. Here are better ways to start saving money.
Source
- Wikipedia. “Firestone and Ford tire controversy.” https://en.wikipedia.org/wiki/Firestone_and_Ford_tire_controversy. Accessed January 9, 2024.

Did the post resonate with you?
More importantly, did I answer the questions you have about this topic? Let me know in the comments if I can help in some other way!
Your comments are not just welcomed; they’re an integral part of our community. Let’s continue the conversation and explore how these ideas align with your journey towards Money Bliss.